



Why Does Condensation Appear Around Fasteners in Hollow MGO Cleanroom Panels?
Time : September 04, 2026 View : 371
Condensation forms around a fastener when its local surface temperature falls below the room-air dew point, usually because metal creates a thermal bridge or moist air leaks through the joint. Condensation around a fastener is easy to blame on a defective panel, yet the visible water may be the final symptom of a thermal bridge, air path, pressure difference, or installation detail. Hollow MGO cleanroom panels combine skins, a core geometry, joints, fasteners, trims, and services. Moisture control depends on that entire assembly.
A high-humidity room makes small temperature differences more important. If a metal screw or frame conducts heat toward a cold surface, the local temperature can fall below the room dew point while the surrounding skin remains dry. The result may be a ring of moisture, staining, sealant failure, or hidden water inside the joint.
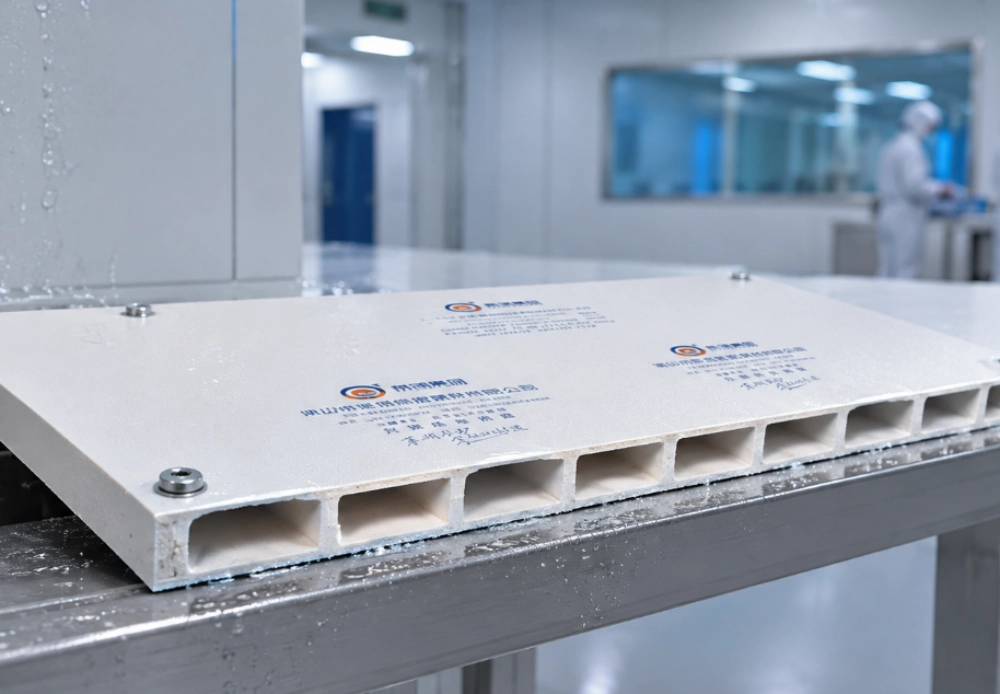
Calculate Dew Point Before Inspecting the Panel
Air temperature and relative humidity define the dew point. Surface temperature below that point can support condensation. Measure room conditions and the panel surface at the same time, especially near doors, corners, ceiling supports, service penetrations, and fasteners. A single humidity reading taken far from the wet spot may miss the actual microclimate. Log room temperature and relative humidity at the time of the symptom, calculate dew point, and measure the fastener-head and surrounding panel temperatures.
Look for Local Cold Paths
Fasteners, metal rails, brackets, window frames, door frames, and uninsulated service supports can conduct heat. The path may be short but still create a cold point. Thermal imaging can help locate patterns, while contact measurements confirm emissivity and surface temperature. Compare a fastener head, nearby skin, joint line, and an undisturbed panel area.
Condensation may also occur at a gap behind the head rather than on the visible face. Humid air moving through a loose joint or an unsealed cut edge can meet a colder layer. Inspect seal continuity and backing before deciding that adding surface sealant will solve the problem.
Joint Geometry Controls Air and Moisture Movement
A panel joint should close consistently along its length. Uneven compression, damaged edges, incorrect sealant, or a frame that is out of alignment creates a path for humid air. Positive-pressure cleanrooms push air outward, but pressure at the wrong opening can also drive moisture into a cold construction layer.
The joint must handle movement. Temperature changes, ceiling loading, building deflection, and impact can open a seam after installation. A rigid sealant may crack when the panel moves; a flexible material may lack the required chemical or hygienic resistance. Specify the joint, sealant, primer, backing, and preparation as one tested detail.
Use the Hollow MGO Panel Within Its Design Boundary
The Hollow Core MGO Sandwich Panel can be evaluated for cleanroom walls and ceilings where the core, skin, joint, fire strategy, and moisture exposure are suitable. Confirm panel thickness, facing material and coating, dimensions, support spacing, fastener type, cut-edge treatment, load condition, and cleaning chemicals before finalizing the enclosure. LAIRUN lists effective widths of 950 and 1150 mm, thickness options from 50 to 200 mm, and project lengths generally up to 6000 mm for the Hollow Core MGO Sandwich Panel.
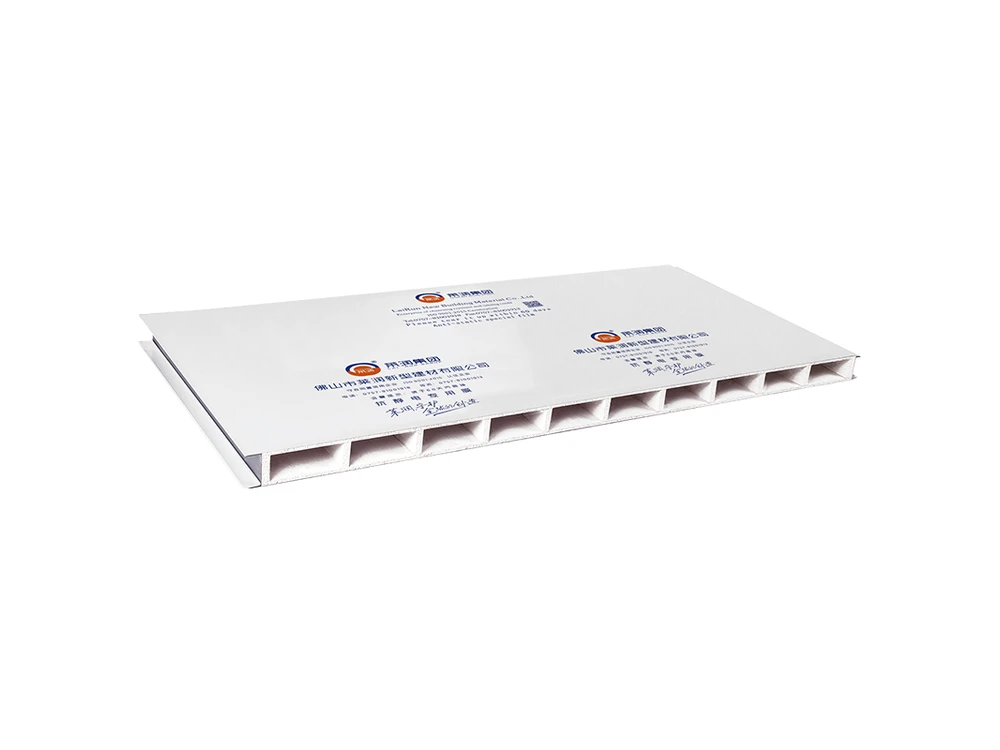
LAIRUN’s product center includes panel systems for controlled environments. The panel should be selected with door, window, cove, ceiling, service, and repair details visible in the same drawing. A product page cannot replace the room’s dew-point calculation, pressure plan, or inspection hold points.
Investigate the Fastener Before Sealing It
A wet fastener can result from a cold bridge, a leak from the room side, water entering from the exterior, or moisture trapped during construction. Photograph the condition, measure temperature and humidity, remove only under a controlled procedure, and inspect the screw, washer, substrate, surrounding core, and sealant. Drying the surface without finding the path will produce a temporary result. Check screw diameter, washer, embedment, compression of the joint, corrosion, missing thermal break, and whether the fastener penetrates a cold structural member.
Cut edges deserve special attention. Site modifications can expose the core or break the coating around a hole. Metal swarf left against a wet surface can create rust staining that looks like panel corrosion. Clean, seal, and record every opening before services are commissioned.
Commission Cleaning and Pressure Together
A cleanroom may be dry during construction and wet during operation. Mock up a wall-to-ceiling joint, internal and external corners, a fastener, a service penetration, and a door frame. Run the approved washdown or wipe procedure while the room is at its operating humidity and pressure. Check whether water remains at fasteners or travels behind the skin.
Early operation should create a baseline. Record dew point, room pressure, supply and return conditions, panel surface temperature, fastener locations, visible moisture, sealant appearance, and cleaning events. Review seasonal changes. A summer symptom may disappear in a dry season without the underlying cold path being corrected.
Separate Construction Moisture From Operating Condensation
Wet screed, uncured sealant, wash water, and trapped moisture can remain in a new enclosure before HVAC reaches its design balance. Record the handover date, room conditioning, construction drying, and the first appearance of water. If condensation begins only after humid production or washdown, compare the event with dew point and pressure rather than assuming the panel was wet from installation.
A service penetration may also create a hidden vapor path. Inspect insulation continuity, backing, trim, gasket, and the route around the fastener. Repair should restore the approved assembly and leave a record of what changed. Painting over a ring does not demonstrate that the thermal bridge or air leak has been corrected.
Use a Symptom-to-Inspection Log
Link condensation to dew-point readings, room pressure, surface temperature, washdown, HVAC alarms, and location. Link rust staining to cut edges, swarf, fasteners, and external water. Link cracked sealant to movement and adhesion. A structured log keeps maintenance from replacing unrelated panels when the real cause is room control or a service detail.
Trend the repaired location through at least one representative production and cleaning cycle before closing the issue. Include photographs under the same angle and light so a small return of moisture or staining can be distinguished from an old mark.
Verify the Repair Through Another Humidity Cycle
After correcting insulation, sealant, fastener, or air leakage, repeat the operating condition that produced the symptom. Record dew point, surface temperature, pressure, and visible moisture for enough time to capture HVAC cycles. A dry surface immediately after repair is not proof that condensation will not return during the next washdown or humid production period.
Update drawings and the maintenance record with the repaired detail and materials. If similar fasteners occur elsewhere, inspect a sample before damage appears. One wet location may be an isolated installation defect or an early sign of a repeated detail; the pattern across the room helps distinguish the two.
Where repeated condensation has affected coatings or joints, inspect adhesion and substrate condition after drying. Replacing sealant over a damp or contaminated surface can fail quickly. Use the specified removal, cleaning, primer, cure, and verification method, and protect the room from particles during repair.
LAIRUN’s case center can help frame enclosure details, while the contact page supports review of room conditions, drawings, cut edges, support, cleaning, and the condensation evidence collected on site.
FAQ
Q1: Why can condensation appear around a cleanroom panel fastener?
A: The fastener or its support may form a thermal bridge, or humid air may reach a colder layer through a gap, cut edge, or failed seal.
Q2: Is high humidity alone proof of a panel problem?
A: No. Condensation requires the surface to fall below dew point, so room conditions, HVAC balance, thermal bridges, pressure, and installation must be checked together.
Q3: Should surface sealant be added around every wet fastener?
A: Not before the moisture path is identified. Surface sealing can hide a leak or trap moisture if the cause is behind the panel.
Q4: Which details deserve a cleanroom mockup?
A: Include a panel joint, fastener, cut edge, ceiling support, corners, doors, windows, service penetration, sealant, and the actual cleaning method.
Q5: What data helps diagnose panel condensation?
A: Record air temperature, relative humidity, dew point, surface temperatures, pressure, fastener locations, cleaning events, seal condition, and photographs over time.
